June 28, 2015
The OpenShift Origin project provides Ansible playbooks and roles for installing OpenShift on various infratructure. I’m going to try out the example using Vagrant and VirtualBox on my Mac. I’m not very familiar with Vagrant or OpenShift v3 yet, so I’m just going to think out loud and see how it goes. I’ve also recently started testing OpenShift Enterprise.
Some Background
OpenShift Origin is an opensource PaaS (platform as a service). It is the upstream project for Red Hat’s OpenShift Online and OpenShift Enterprise. Version 3 of the OpenShift platform is a complete rewrite just launched in June 2015. It now utilizes Docker as the container engine and Kubernetes as the orchestrator. The Enterprise edition uses Red Hat Atomic Enterprise Platform as the underlying OS. The example used in this post will create Vagrant CentOS boxes.
Initial Setup
First you’ll need to install Vagrant on your Mac.
Next clone the openshift-ansible repo.
Now following the instructions in README_vagrant.md create three boxes that will form the OpenShift cluster. One master and two nodes.
cd ~/src && git@github.com:openshift/openshift-ansible.git
cd openshift-ansible
# Install the requisite vagrant plugins
$ vagrant plugin install vagrant-hostmaster
# Create the virtual boxes, but don't run ansible yet
$ vagrant up --no-provision

# Later we will provision like this:
#  vagrant provision
# When we want to try again it will look like this
#  vagrant reload --provision
- You may want to go ahead and put this into a file called
reset.shso you can more easily test over and over.
#!/bin/bash
for node in node1 node2 master; do
  vagrant destroy -f $node;
done
vagrant up --no-provision
vagrant provision
There are now 3 machines (boxes) which where added to /etc/hosts by vagrant.
tail -5 /etc/hosts
## vagrant-hostmanager-start id: bfad3436-5a92-4f03-b555-55bd186dd0ba
192.168.100.200	ose3-node1.example.com
192.168.100.201	ose3-node2.example.com
192.168.100.100	ose3-master.example.com
## vagrant-hostmanager-end
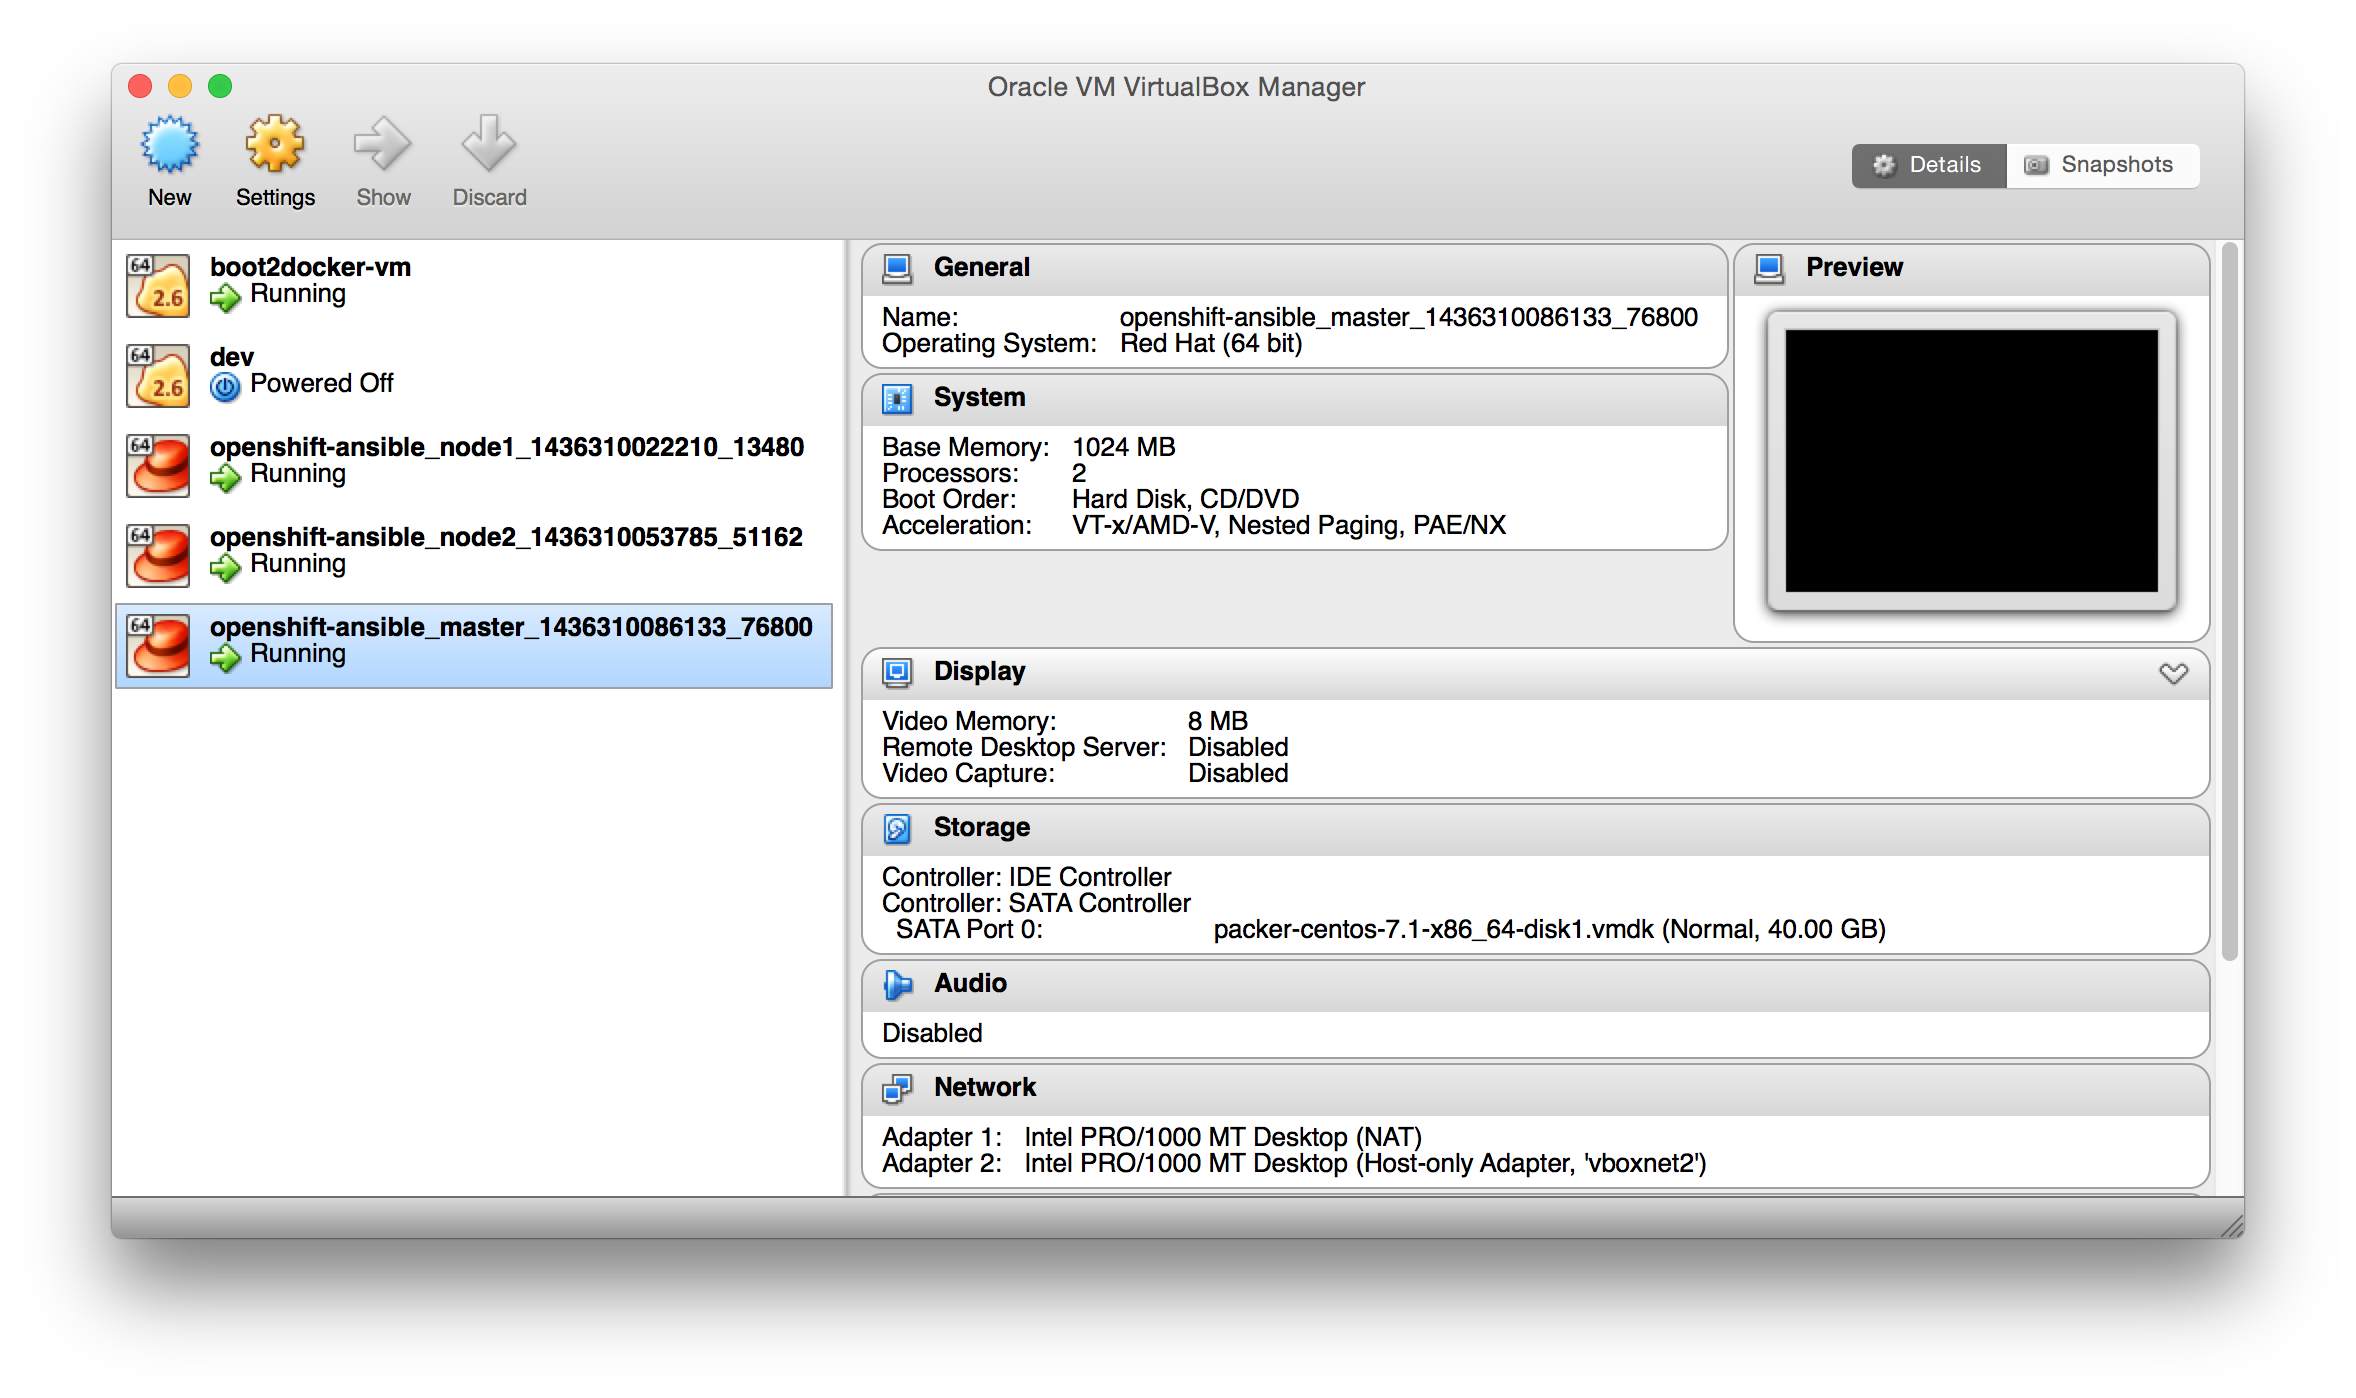
You can in the VirtualBox GUI that they are running.

$ vagrant status
Current machine states:

node1                     running (virtualbox)
node2                     running (virtualbox)
master                    running (virtualbox)
They can be accessed over ssh using their short vagrant names like this:
$ vagrant ssh master
$ vagrant ssh node1
$ vagrant ssh node2
Not only that, but port 8443 on the Mac localhost is forwarded to port 8443 on the master node. Nothing is listening on the master just yet though.
On to the provisioning step.
Provisioning with Ansible
Run the byo/config.yml Ansible playbook on the cluster by way of the vagrant provision command.
This basically implements the tasks from README_origin.md, so read that for background.
$ vagrant provision
Sanity Check OpenShift
Expect an ok from the healthcheck
$ vagrant ssh node2
[vagrant@ose3-node2 ~]$ curl -k https://ose3-master.example.com:8443/healthz
ok

OpenShift console command oc is similar to kubectl. Let’s blindly try a few commands.
$ vagrant ssh master

[vagrant@ose3-master ~]$ oc get nodes
NAME                      LABELS                                           STATUS                     AGE
ose3-master.example.com   kubernetes.io/hostname=ose3-master.example.com   Ready,SchedulingDisabled   11h
ose3-node1.example.com    kubernetes.io/hostname=ose3-node1.example.com    Ready                      11h
ose3-node2.example.com    kubernetes.io/hostname=ose3-node2.example.com    Ready                      11h

[vagrant@ose3-master ~]$ oc get services
NAME         CLUSTER_IP   EXTERNAL_IP   PORT(S)   SELECTOR   AGE
kubernetes   172.30.0.1   <none>        443/TCP   <none>     11h

[vagrant@ose3-master ~]$ oc get all
NAME      TYPE      SOURCE
NAME      TYPE      STATUS    POD
NAME      DOCKER REPO   TAGS      UPDATED
NAME      TRIGGERS   LATEST VERSION
CONTROLLER   CONTAINER(S)   IMAGE(S)   SELECTOR   REPLICAS   AGE
NAME      HOST/PORT   PATH      SERVICE   LABELS    TLS TERMINATION
NAME         CLUSTER_IP   EXTERNAL_IP   PORT(S)   SELECTOR   AGE
kubernetes   172.30.0.1   <none>        443/TCP   <none>     11h
NAME      READY     STATUS    RESTARTS   AGE

[vagrant@ose3-master ~]$ openshift version
openshift v1.0.6-2-ge2a02a8
kubernetes v1.1.0-alpha.0-1605-g44c91b1
Configure OpenShift
Now to walk through the OpenShift getting started docs, and reference the troubleshooting doc or the redhat beta docs or the vagrant deploy docs.
Create Docker Registry
BUG This fails. See Issue #391
- Create a docker registry. Origin uses
/etc/originwhile enterprise uses/etc/openshift.
$ vagrant ssh master
[vagrant@ose3-master ~]$ export KUBECONFIG=/etc/origin/master/admin.kubeconfig
[vagrant@ose3-master ~]$ export CREDENTIALS=/etc/openshift/master/openshift-registry.kubeconfig
[vagrant@ose3-master ~]$ sudo chmod +r $KUBECONFIG $CREDENTIALS

[vagrant@ose3-master ~]$ oadm registry --create --credentials=$CREDENTIALS --config=$KUBECONFIG
deploymentconfigs/docker-registry
services/docker-registry

[vagrant@ose3-master ~]$ oc get pods
NAME                       READY     STATUS    RESTARTS   AGE
docker-registry-1-deploy   0/1       Pending   0          45s

[vagrant@ose3-master ~]$ oc get pods
NAME                       READY     STATUS         RESTARTS   AGE
docker-registry-1-deploy   0/1       ExitCode:255   0          6m

[vagrant@ose3-master ~]$  oc logs docker-registry-1-deploy
F1009 03:06:30.593315       1 deployer.go:64] couldn't get deployment default/docker-registry-1: Get https://ose3-master.example.com:8443/api/v1/namespaces/default/replicationcontrollers/docker-registry-1: dial tcp: lookup ose3-master.example.com: no such host

[vagrant@ose3-master ~]$ oc get all
NAME      TYPE      SOURCE
NAME      TYPE      STATUS    POD
NAME      DOCKER REPO   TAGS      UPDATED
NAME              TRIGGERS       LATEST VERSION
docker-registry   ConfigChange   1
CONTROLLER          CONTAINER(S)   IMAGE(S)                                  SELECTOR                                                                                REPLICAS   AGE
docker-registry-1   registry       openshift/origin-docker-registry:v1.0.6   deployment=docker-registry-1,deploymentconfig=docker-registry,docker-registry=default   0          6m
NAME      HOST/PORT   PATH      SERVICE   LABELS    TLS TERMINATION
NAME              CLUSTER_IP    EXTERNAL_IP   PORT(S)    SELECTOR                  AGE
docker-registry   172.30.8.16   <none>        5000/TCP   docker-registry=default   6m
kubernetes        172.30.0.1    <none>        443/TCP    <none>                    11h
NAME                       READY     STATUS         RESTARTS   AGE
docker-registry-1-deploy   0/1       ExitCode:255   0          6m
Fix DNS Issue
The vagrant plugin hostmanager sets up the hosts files on the nodes, but as this RedHat knowledgebase article points out, the resolver also needs to work.
The vagrant dnsmasq plugin, may be a fix, but since I had some ruby problems I tried the vagrant landrush plugin instead.
brew install landrush
vagrant plugin install vagrant-landrush
Then update the Vagrantfile like this:
diff --git a/Vagrantfile b/Vagrantfile
index a832ae8..bfa13ac 100644
--- a/Vagrantfile
+++ b/Vagrantfile
@@ -11,6 +11,8 @@ Vagrant.configure(VAGRANTFILE_API_VERSION) do |config|
   deployment_type = ENV['OPENSHIFT_DEPLOYMENT_TYPE'] || 'origin'
   num_nodes = (ENV['OPENSHIFT_NUM_NODES'] || 2).to_i

+  config.landrush.enabled = true
+  config.landrush.tld = 'example.com'
   config.hostmanager.enabled = true
   config.hostmanager.manage_host = true
   config.hostmanager.include_offline = true
@@ -39,6 +41,7 @@ Vagrant.configure(VAGRANTFILE_API_VERSION) do |config|
     config.vm.define "node#{node_index}" do |node|
       node.vm.hostname = "ose3-node#{node_index}.example.com"
       node.vm.network :private_network, ip: "192.168.100.#{200 + n}"
+      node.landrush.host_ip_address =  "192.168.100.#{200 + n}"
       config.vm.provision "shell", inline: "nmcli connection reload; systemctl restart network.service"
     end
   end
@@ -47,6 +50,7 @@ Vagrant.configure(VAGRANTFILE_API_VERSION) do |config|
     master.vm.hostname = "ose3-master.example.com"
     master.vm.network :private_network, ip: "192.168.100.100"
     master.vm.network :forwarded_port, guest: 8443, host: 8443
+    master.landrush.host_ip_address = "192.168.100.100"
     config.vm.provision "shell", inline: "nmcli connection reload; systemctl restart network.service"
     master.vm.provision "ansible" do |ansible|
       ansible.limit = 'all'
DNS works better, but registry creation still fails with a host lookup failure.
[vagrant@ose3-master ~]$ oc get pods
NAME                       READY     STATUS         RESTARTS   AGE
docker-registry-1-deploy   0/1       ExitCode:255   0          4m
[vagrant@ose3-master ~]$ oc logs docker-registry-1-deploy
F0726 02:41:00.845168       1 deployer.go:64] couldn't get deployment default/docker-registry-1: Get https://ose3-master.example.com:8443/api/v1/namespaces/default/replicationcontrollers/docker-registry-1: dial tcp: lookup ose3-master.example.com: no such host
Create OpenShift App
BUG this fails
- Login as test / test then create a project and an app. This will peform a docker build, but will fail when it attempts to push to the registry above.
$ vagrant ssh master
[vagrant@ose3-master ~]$ oc login
Username: test
Authentication required for https://ose3-master.example.com:8443 (openshift)
Password:
Login successful.

You don't have any projects. You can try to create a new project, by running

    $ oc new-project <projectname>

[vagrant@ose3-master ~]$ oc new-project test
Now using project "test" on server "https://ose3-master.example.com:8443".

[vagrant@ose3-master ~]$ oc new-app -f https://raw.githubusercontent.com/openshift/origin/master/examples/sample-app/application-template-stibuild.json
services/frontend
routes/route-edge
imagestreams/origin-ruby-sample
imagestreams/ruby-20-centos7
buildconfigs/ruby-sample-build
deploymentconfigs/frontend
services/database
deploymentconfigs/database
Service "frontend" created at 172.30.228.57 with port mappings 5432->8080.
A build was created - you can run `oc start-build ruby-sample-build` to start it.
Service "database" created at 172.30.167.96 with port mappings 5434->3306.

[vagrant@ose3-master ~]$ oc status
In project test

service database (172.30.167.96:5434 -> 3306)
  database deploys docker.io/openshift/mysql-55-centos7:latest
    #1 deployment pending 25 seconds ago

service frontend (172.30.228.57:5432 -> 8080)
  frontend deploys origin-ruby-sample:latest <-
    builds https://github.com/openshift/ruby-hello-world.git with test/ruby-20-centos7:latest
    build 1 running for 20 seconds
    #1 deployment waiting on image or update

To see more information about a Service or DeploymentConfig, use 'oc describe service <name>' or 'oc describe dc <name>'.
You can use 'oc get all' to see lists of each of the types described above.

[vagrant@ose3-master ~]$ oc get pods
NAME                        READY     REASON         RESTARTS   AGE
database-1-deploy           0/1       ExitCode:255   0          1m
ruby-sample-build-1-build   0/1       ExitCode:255   0          1m
Check out the OpenShift Console
- Add admin user to the test Project.
$ vagrant ssh master
[vagrant@ose3-master ~]$ oadm policy add-role-to-user admin admin -n test
Be sure you updated your hosts file as described above then browse to one of the following and login as admin / admin:
- https://localhost:8443/console/
- https://ose3-master.example.com:8443/console/
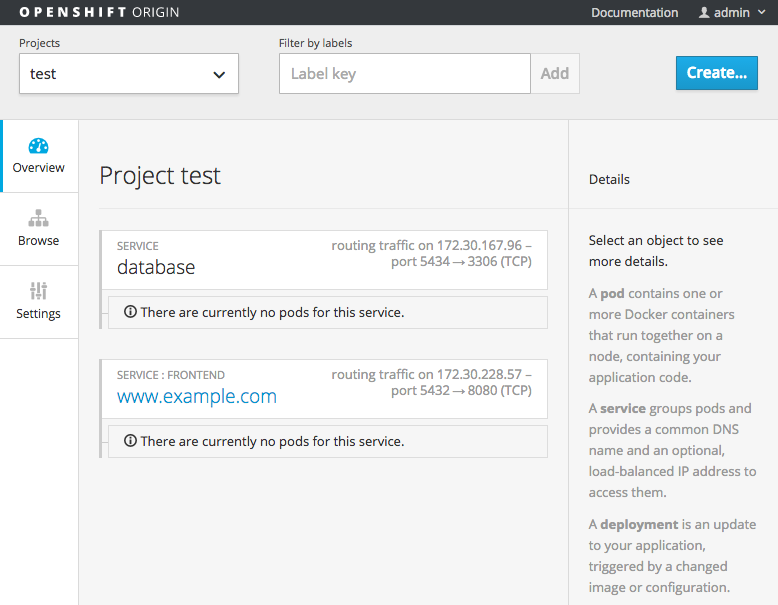
Once you click into the test project you’ll see broken services like this.


